1987 Vanagon GL Wolfsburg
Bilstein Shock Installation

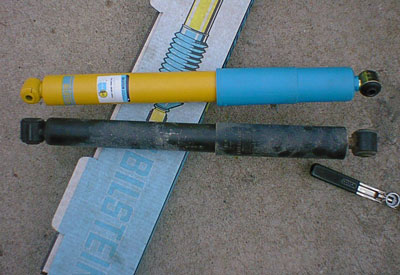
This is the procedure I used when installing Bilstein HD shocks on my 1987 Vanagon 2WD. This should not be used as a comprehensive, official, or sole source of information when installing your shocks. I used the Vanagon Bentley manual and suggestions from the Vanagon List to create this procedure. The entire process took apx. five hours including two trips to Sears and a break for some sub sandwiches. The rear shocks took apx. one half hour per side, the front shocks took considerably longer. I purchased the shocks from eshocks.com, they offered great service and pricing.
Tools required
•Hydraulic floor jack
•Jack stand
•scissor-type jack, or equivalent
•19mm and 22mm sockets with socket wrench(s)
•17mm, 19mm and 22mm wrenches
•Wrench or vice grips (to grip shaft of old front shocks)
•Needle nose pliers
•Liquid wrench
•Torque wrench, 150 ft/lbs+.
•Lug wrench (or use the 19mm socket w/ an extension)
•Breaker bar (I use the handle from my floor jack)
Rear Shocks, Removing
1.Spray upper and lower nuts/bolts with liquid wrench.
2.Loosen bottom bolt, 19mm. Use the breaker bar if necessary.
3.Raise rear of van slightly, leave wheels on ground, use a jack stand.
4.Loosen upper bolt, 19mm. Use the breaker bar if necessary.
5.Remove lower bolt.
6.Remove upper bolt, note: the shock will fall out at this point.
Rear Shocks, Installing
1.Compress the shocks a few times prior to installing.
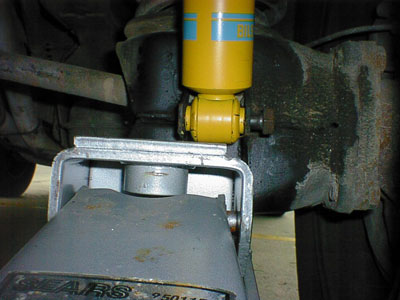
2.Hold shock in place, note proper orientation: dust boot on top, install upper bolt, finger tight.
3.GAS SHOCKS ONLY: Use a hydraulic floor jack to compress the shock enough to line up mounting point
4.Install lower bolt.
5.Torque upper and lower bolts to proper torque specs.
6.Lower the van off of the jack stand.
Front Shocks, Removing
1.Spray upper and lower nuts/bolts with liquid wrench.
2.Loosen lugnuts.
3.Raise wheels off of ground, use a jack stand.
4.Remove wheel.
5.Loosen lower bolt in lower control arm, 22mm. Use the breaker bar if necessary.
6.Loosen upper nut, 17mm. The shaft will rotate freely, on a Boge there are flat sides on the shaft, use a wrench or vice grips, on a Bilstein there is a 5mm allen socket in the top of the shaft.
7.When nut backs off to the point where it's hitting the wrench or vice grips use a pair of needle nose pliers to grip the shaft under the nut.
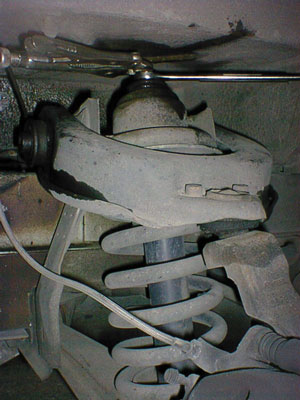
8.Using a hydraulic floor jack raise the lower control arm enough to slightly compress the spring, do not lift the van off of the jack stand.
9.Remove the lower bolt.
10.Remove the upper nut, at this point the shock will fall out, note in what order the dust boot and hardware come off.
Front Shocks, Installing
1.Compress the shocks a few times prior to installing.
2.Install the dust boot from the old shock on the new unit.
3.Install the new shock; Note: you may need to compress it to get it to clear the lower control arm.
4.Put the washer and rubber spacer back then tighten the upper nut finger tight.
5.Look at the lower control arm, there will be a small metal sleeve in the rear hole where the lower mounting bolt should be, remove this sleeve.
6.Compress the shock enough to reinstall the bolt, sleeve and nut. Note: I had to use the jack from my VW Fox to compress the shock.
7.Torque the upper nut, use the 5mm allen wrench to keep the shaft from rotating.
8.Torque the lower bolt.
9.Reinstall the wheel, tighten lugnuts.
10.Lower van onto ground, torque lugnuts.


